HOW I RE-UPHOLSTERED MY BED FRAME WITH TABLECLOTHS

As part of my master bedroom makeover, I knew I wanted to re-upholster our bed. It’s a good budget bed - this one from Happy Beds in fact - but it’s a little basic. By reupholstering it, I thought I could make it a little more exciting.
My inspiration for this little DIY was this chair from Anthropologie. I love the way the stripes intersect each other, as well as the balance between the two colours. I’ve come to realise that I really love monochrome when it’s not an exact 50/50 split. Stripes of different widths is a little bit more subtle, while going for something a little off-white softens the look a bit too.

The plan was to take two different fabrics and patch them together, but could I find two monochrome stripes of different sizes anywhere? Absolutely not. What I did find however was a tablecloth in H&M Home which already had these varied stripes within it. This actually made the whole thing a whole lot easier, and I didn’t have to sew a single thing in order to re-upholster the bed - just a trusty staple gun.
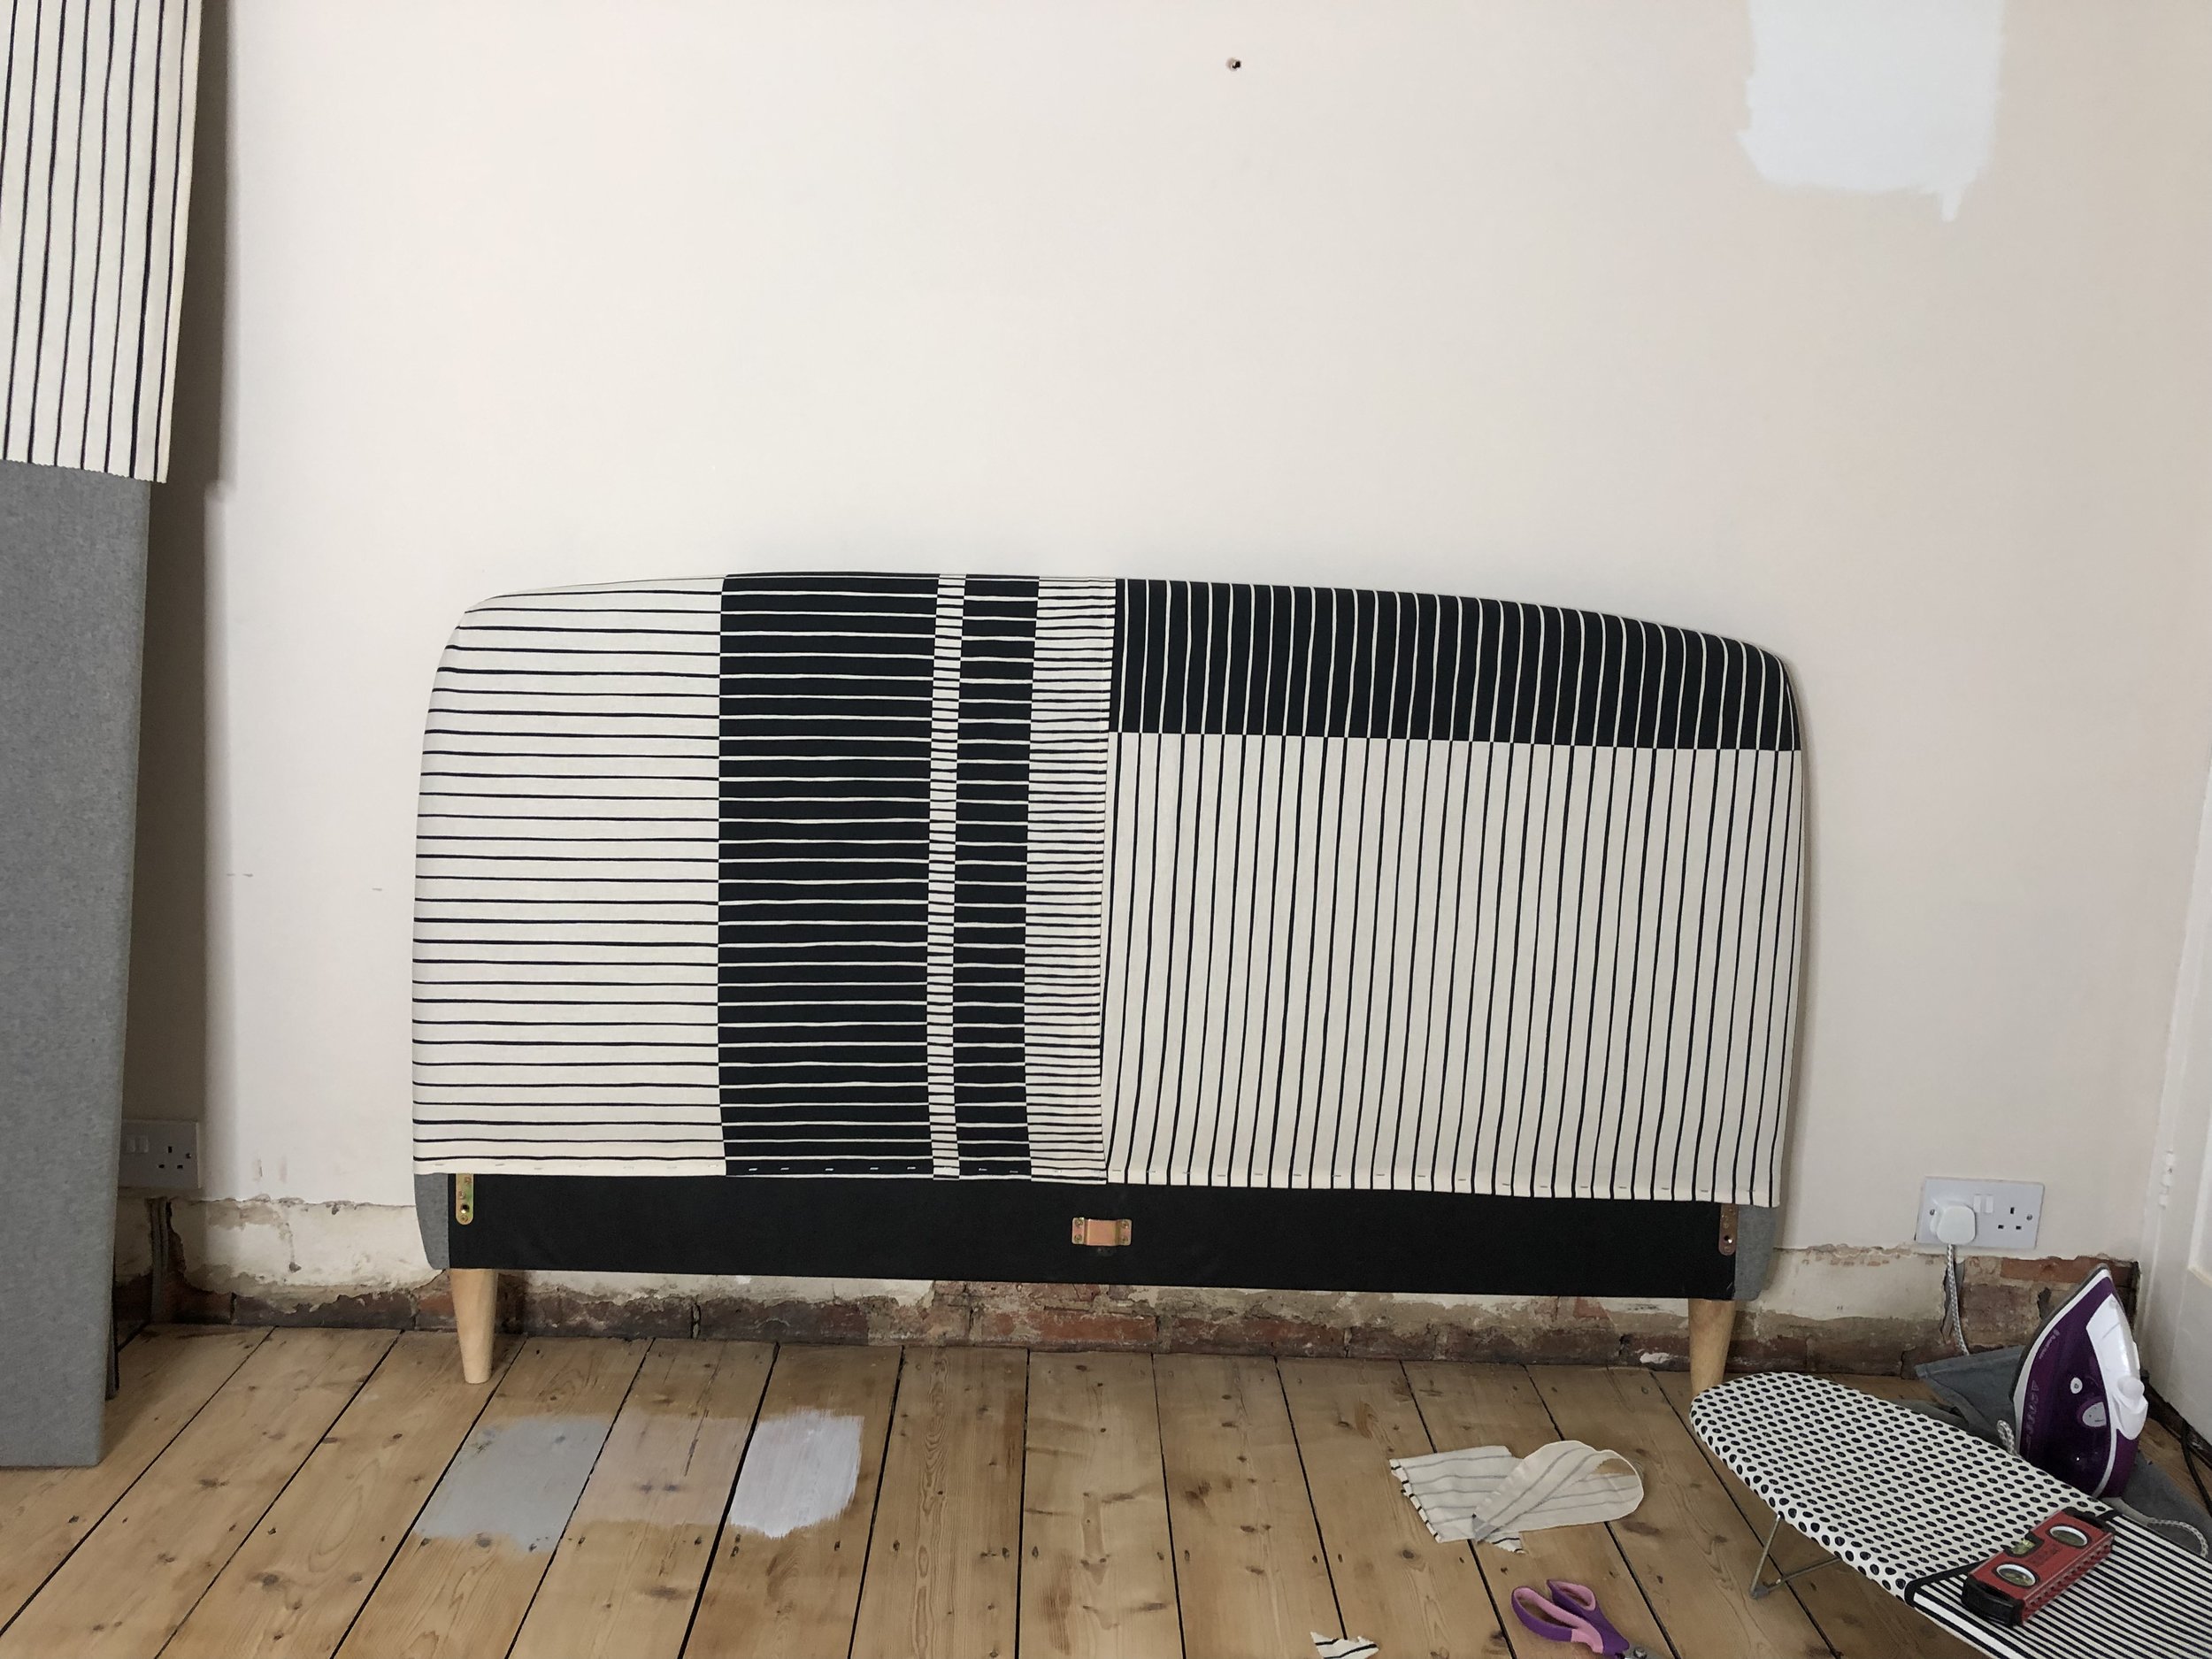
After I took the bed apart, it was time to start planning the layout. Headboard was most important, so I focused their first while I had the most bits of whole table cloth. This is what I decided on..

Not looking too inspiring at the moment..
The process itself was pretty easy. I didn’t bother taking the existing fabric off, because I might want to strip it back one day. All I really needed to do was staple into the wooden frame underneath the fabric, making sure that the lines stayed straight and there were no ripples in the fabric.

The corners were the most tricky bits, trying to get a neat fold but also making sure the pattern looked good. After some fiddling, the results were pretty good though.

I tried to keep the back as neat as possible, but as it’s against the wall it doesn’t really matter. Once I’d done both sides, it looked like this - much better than before!
The footboard and sides were a lot easier. The footboard we did with one length of the fabric, and the sides we pieced together from scraps.

Once the bed was back together, this was the result! What do you think? Of course, the room is a bit of a wreck at the moment with the ongoing makeover, but I’ll update this post with some of the finished room pictures later down the line.

All in all I think we spent about £45 on the tablecloths, which is pretty good for the yardage we got from it, and the bed has a little bit more to it now! Can't wait to show you what it looks like in the final scheme.