IKEA HACK: HAVSTA CABINET DIY
Take one (pretty boring) Havsta cabinet and give it this cool, graphic look with this IKEA hack.
I've been looking for a new cabinet for the bedroom for ages, but could not find anything that was exciting me. IKEA’s Havsta cabinet was the only thing I could find that was around the size and shape I wanted, but it’s honestly just too plain. I bought it anyway, and decided I’d try to figure out something to do with it.
This one took a bit of forced thinking, but I eventually came up with a concept. Want to see what I did with it?
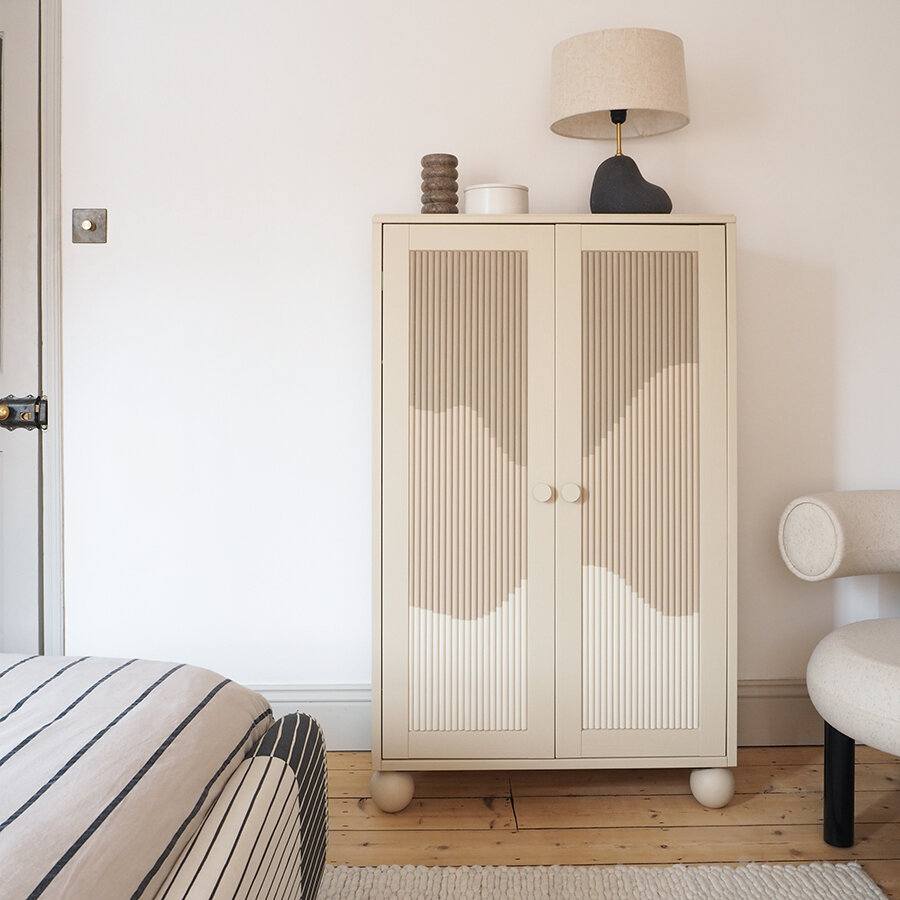
Cool right? Basically, I added some new legs (these from Pretty Pegs), painted it in my COAT paints collab colour Well Grounded, and applied some half dowels to the front, taped and painted with this curvy abstract design.
I’ve created a quick step by step guide for anyone who wants to try out this technique for the front of the doors. You can also find the full step by step over on my Instagram stories.


Measure the inset of the cabinet door and cut half dowels to size. You’ll need quite a lot, but you won’t know exactly how many until you’ve got them all cut and on the door.
Place all the dowels roughly on the door and start to mark out your pattern with a pencil.
Using a fine painter’s tape, tape over your lines. I started on the outside of each line so that I could paint the centre section first.
Choose your colour palette! Mine was a mix of random leftovers, but aim for all the same finish, preferably eggshell.
Paint the centre section first. You’ll need to be careful and do a few coats. I raised mine off the floor with a few pieces of scrap timber.
Once the first section is painted and dried, remove the tape. Re-tape over the now painted section, paying close attention, and paint the other two ends. Two coats again please!
Once dried, we can get to sticking. Start on the inside edge, and if you find that the dowels don’t fit exactly, you’ll need to sand down the edge on the last dowels to be fixed. I used spray adhesive because it’s quick and you won’t want these dowels shifting around while they dry.
Once stuck, give the whole cabinet a once over with a clear, matte varnish.
What do you think of this IKEA hack? Drop me a comment and let me know!